We will walk through:
- the creation of a Purchase Order (PO)
- adding lines to a PO
- confirming the PO
- confirming lines in a PO
Along the way, we’ll explore some of the options, and explain what they do.
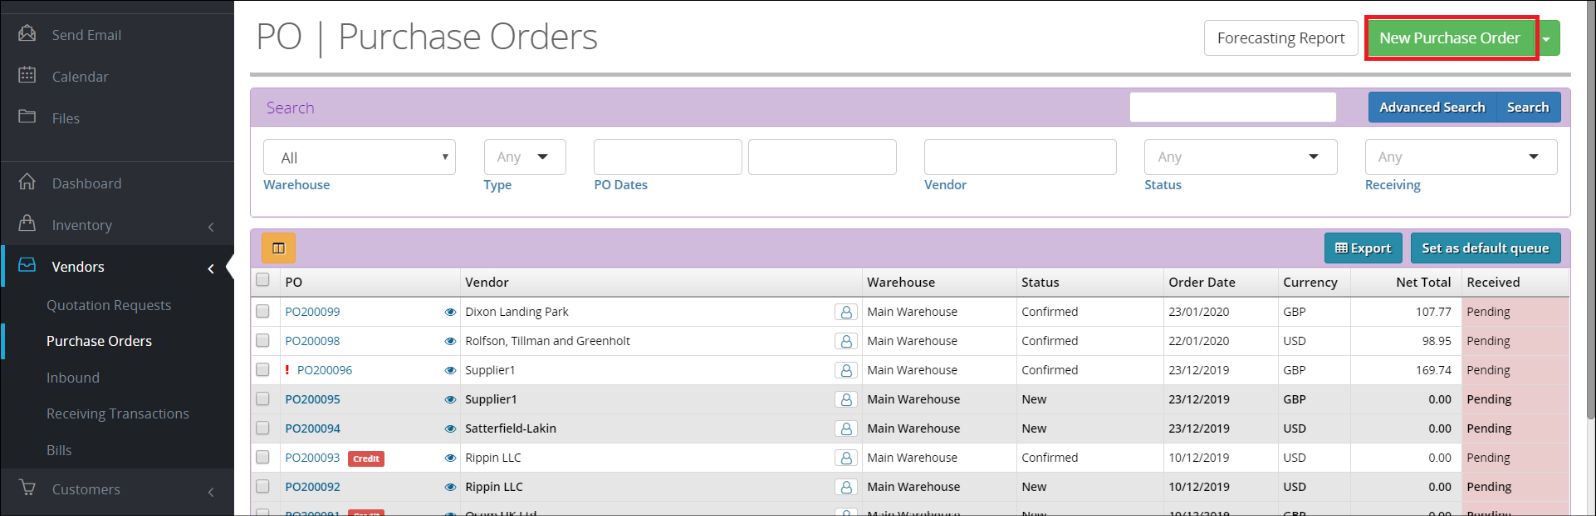
To create a Purchase Order (PO), click ‘Purchase Order’ from the dashboard or in the sidebar, under ‘Vendors’. Next, click ‘New Purchase Order’ in the top right corner of the Purchase Order list.
You will be presented with an input to search for the vendor. If the PO is for a new vendor, then you can add a new vendor from here too. When you have found and selected the correct vendor click ‘Continue’.
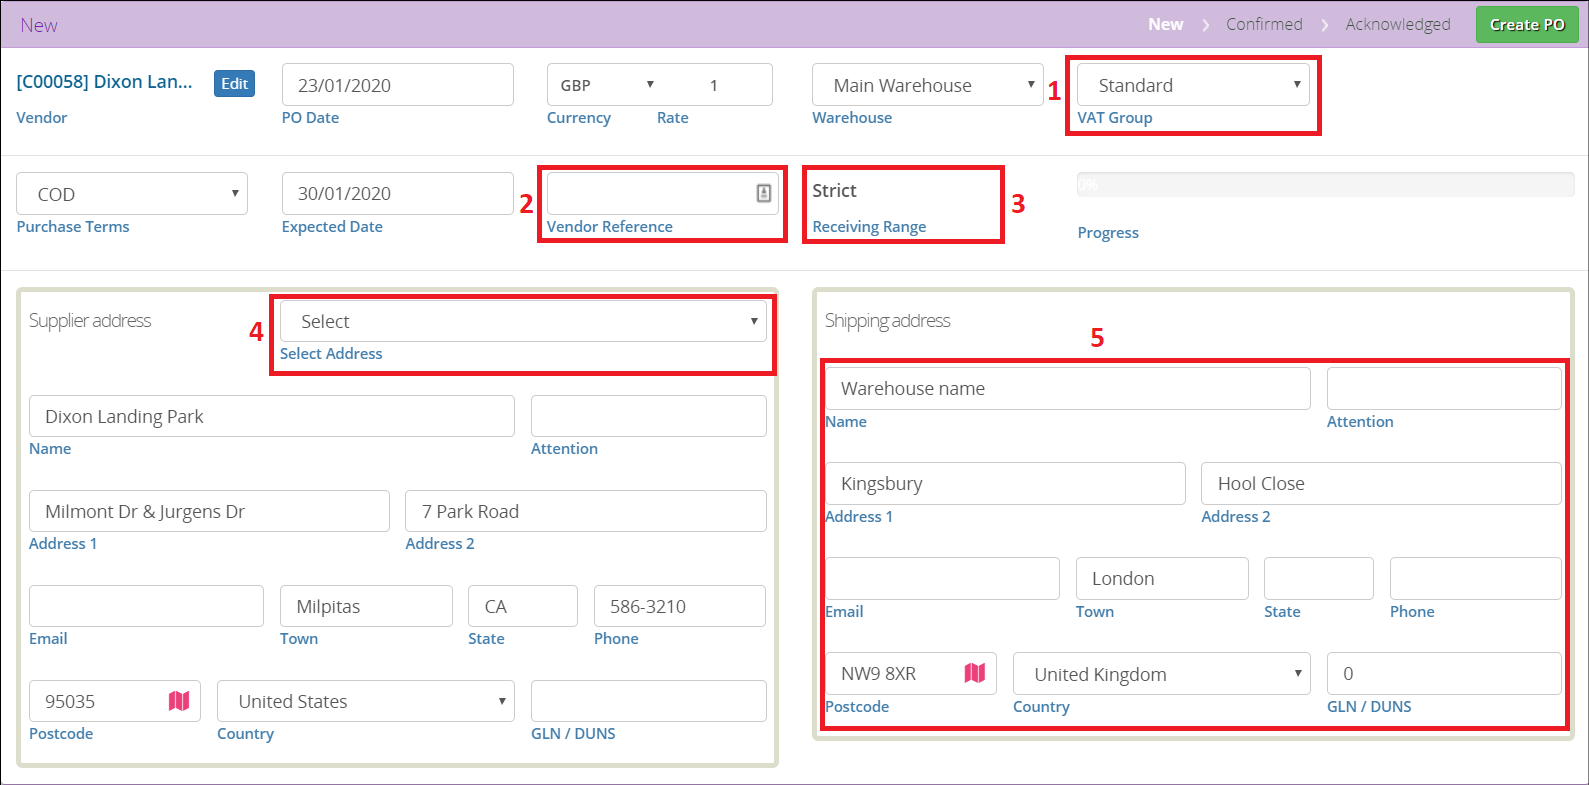
You will now see the initial setup for the PO. Here you can input all relevant details. Highlighted are a few of them:
1. VAT Group
This is the VAT group for this PO. This will be used in conjunction with each items’ VAT type to determine the VAT rate. (see Taxes)
2. Vendor Reference
You can input the vendor reference
3. Receiving Range
This shows the default picking range for the vendor
| Receiving Range | Description |
| Strict | Purchase must be exactly the lines selected |
| Sibling | Purchase may be replaced with a related product, if necessary |
| Sibling-Brand | Purchase can only switch to a related product, if necessary and the same brand |
4. Supplier Address
The vendor address will be auto filled, if an address is saved for that vendor. If multiple addresses are saved for the vendor, then the default address will be used, but you can select from the dropdown to use a different address for this PO
5. Shipping Address
The address will be auto filled from the selected warehouse
After you have input the relevant information, click ‘Create PO’ in the top right corner. You will now be taken to the PO Detail page. You will notice several areas on this page. But first let’s take a look at the Action bar.
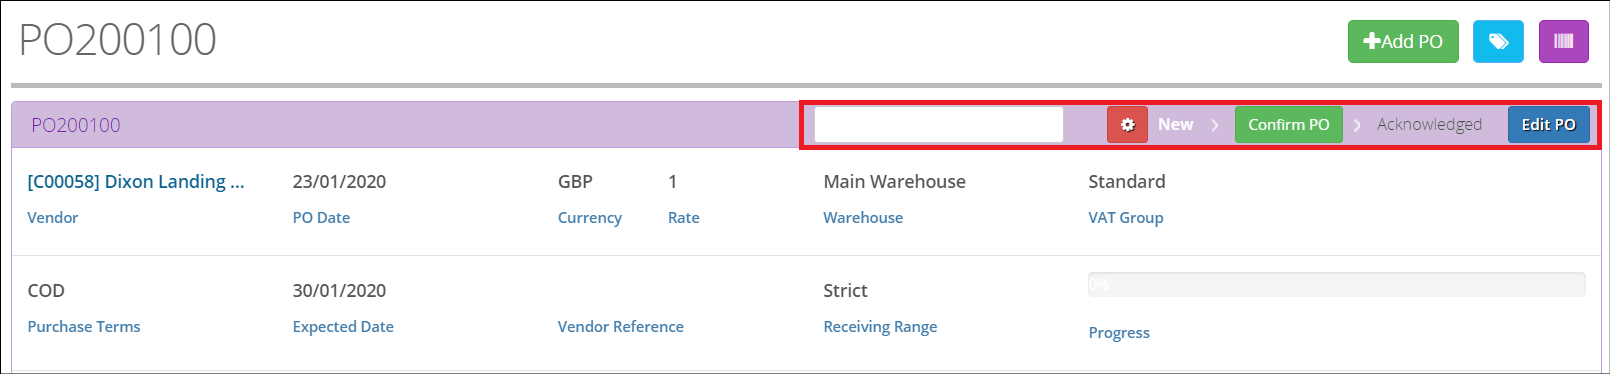 The action bar shows the status (New in this case), a settings button, and the button to Edit the PO. The settings dropdown, accessible by clicking the white-on-red gear, contains some more PO actions. These actions change with the status of the PO.
Next let’s see the PO Details area:

The outer highlighted area is the PO Details area. Inside you can see the PO Details Actions.
- Create Part
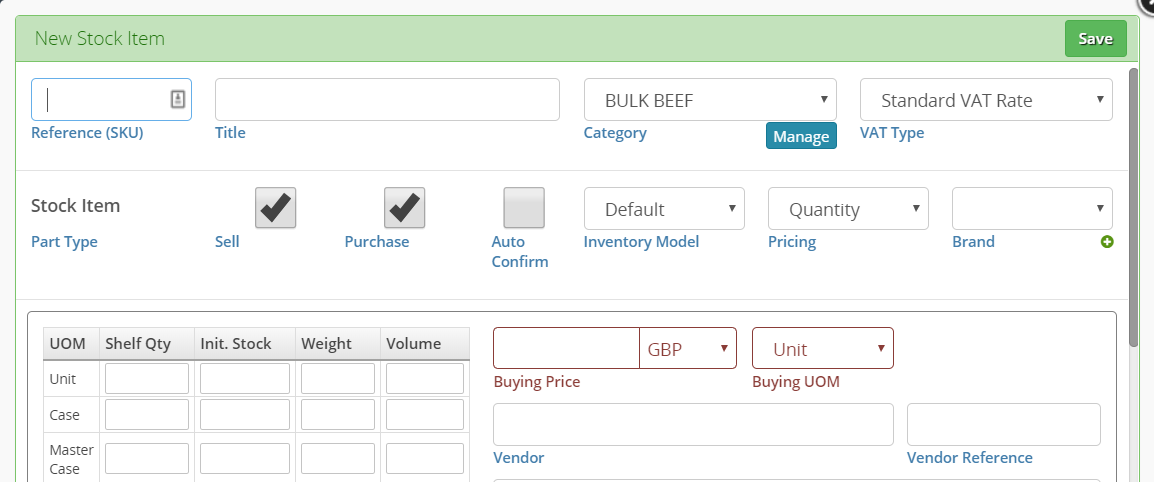
This dialog allows you to create a new product from here, and add it to the PO.
- Add Part

Use this to individually add already existing Parts to the PO. A dialog will show:
1. Part
Type to search for a pre-existing Part from the database
2. Vendor Reference
Add a vendor reference here, to allow the vendor to identify the product using their own references
- Paste Batch
 Use this when you want to add items in bulk, from Excel or an Email. Simply paste the Item ID’s in.
The identifier must be a valid Identifier for an item already in the database. This can be the SKU, EAN or any unique info that identifies the item. ‘Overwrite current’ will take the items that you pasted and overwrite the equivalent items, with the same identifier, already in the PO.
You can enter an identifier and quantity in the same column. For example, "Peasx4", where "Peas" is the SKU, the system will understand the "x4" as the quantity if you leave the quantity column blank
Default quantity is 1.
- Select Batch
Use this to search for and select multiple products easily

1. Type into the search box and press search
2. Filter by Inventory
Selecting the warehouse sets where the inventory values should be drawn from. You can then add Min and Max for inventory values as well
Pressing PO Tools shows the previous sales options:

1. Show Sales
Show previous sales columns in the results list. When unticked the remaining options are not used
2. Purchased
Enter number of Months/Weeks to show
3. Month
Enter whether to go back in Months or Weeks
4. As End Of
The date to search back from
Click search and you will see the search results

Once you have found your results, you fill in the quantity wanted for all the lines that you need. The price is set to the vendor pricelist. Click Continue, to add all the items at once